


 Saeid Sakkaki
This iPhone Feature Could Save Your Life in an Emergency
If you find yourself in a critical and dangerous situation where you don't have access to emergency services and your life is in danger, the iPhone's Check In feature can be your savior! With the help of this feature, you can send your vital information and location to your friends so that they can come to your aid. If you would like to know how to use this feature, stay tuned with us.
Getting to Know the iPhone Check In Feature and Its Terms of Use
"Check In" is an Apple service used to send information such as location and device tracking to people. Although this feature has other uses, its most important use is for situations where you need help in an emergency state. This feature continues to send and receive GPS signals to transmit your current location to the person you choose, even if the iPhone is damaged or turned off. Naturally, the use of this service varies across countries depending on their laws. For example, in South Korea, due to restrictions on sharing current location, only your last known location is sent in Check In.
Another important point is that to use this feature, your iPhone must be updated to iOS 17 or higher. Also, the person you are sending the Check In request to must have at least iOS 17 as well.
How Does the Check In Feature Work?
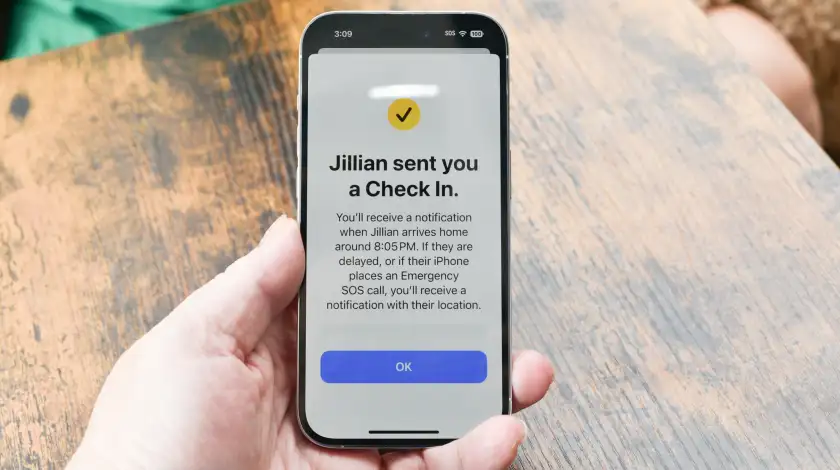
With the Check In feature on your iPhone, you can automatically let a friend or loved one know where you are and choose what details to send them. Your friends can also send you a Check In, giving you their location, battery level, cell signal, and other information while requesting your help. This feature has been used to help locate people in mountaineering groups, rescue teams, documentary crews, tourists, and travelers.
How to Send an Emergency Message on iPhone and Request Help with Check In?
Sending a Check In can be done instantly or on a preset schedule. You can send a Check In request to a friend even if your iPhone battery is at 1%. To do this:
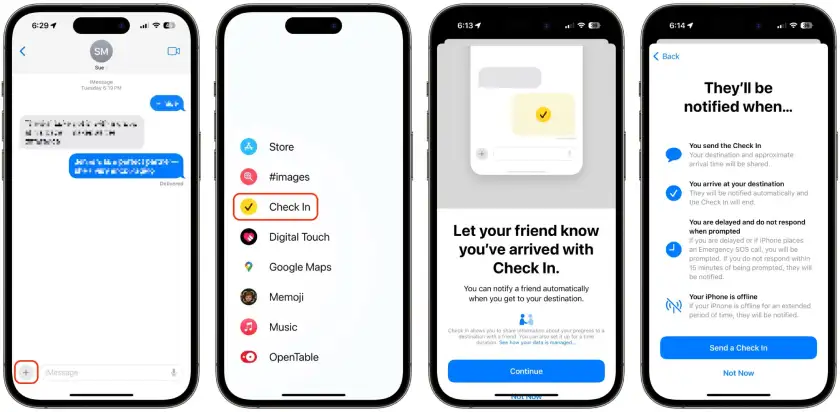
- Open the Messages app.
- Select the person you want from the message list, or press the button
 to send a new message to a contact you haven't messaged yet.
 - From the bottom corner of the screen, tap the button
 , and in the menu that opens, touch the More option, then select Check In.
After selecting Check In, touch the Edit option. Then, depending on your circumstances, select one of the following options:
When I Arrive:
In this case, you create a Check In before traveling or entering a specific situation. If you do not proceed as planned, a Check In request is sent to your contact. To set this up, specify the destination and travel mode (driving, transit, or walking), and set the expected arrival time if needed. Check In monitors your trip and if you deviate from your plan for too long or fail to arrive on time, it automatically notifies your selected contact. If you reach your destination safely, Check In also informs them that you are fine.
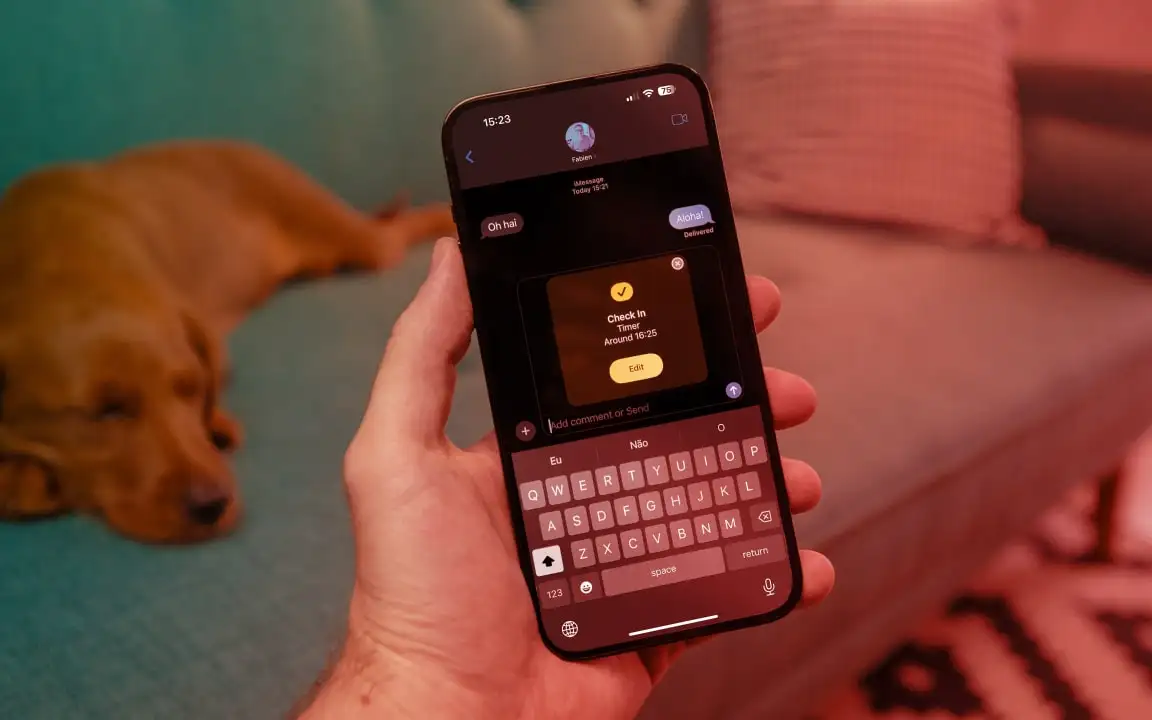
After a Timer:
Here, you specify a timer. If you haven't returned to your original location by the time it expires, a Check In request will be sent. For example, if you're exploring a new city and don't return to the hotel within 2 hours, your contact is alerted that something might be wrong.
- After selecting your preferred mode, tap the button
 to set up and send your Check In.
Add Extra Time to Check In
Your plans may change unexpectedly, requiring you to extend your Check In time—for instance, due to heavy traffic. If so:
- Open the Messages app.
- Open the chat with the contact you sent the Check In to.
- Tap Check In, then select Details.
- Tap Add Time, and choose one of the available options.
Cancel Check In Request
If you need to cancel a Check In request:
- Open the Messages app.
- Open the chat with the contact you sent the Check In to.
- Tap Check In, then select Details.
- Tap Cancel Check In.
Select the Information Shared with Check In
You can specify what information is shared with your contact through Check In:
- Go to your iPhone’s Settings.
- Open the Apps section and select Messages.
- Scroll down and select Check In Data.
You can choose between:
Limited:
Shares your current location, network signal, and battery level of your iPhone and Apple Watch.
Full:
Includes everything in Limited mode, plus your route, and the last time you unlocked your iPhone or Apple Watch.
If you’ve added medical information to the Health app, it will also be shared during emergencies. Additionally, if your Apple Watch contains fitness data, you can share it with friends or emergency teams—but an Apple Fitness+ subscription is required for this.

Conclusion
The amazing features that the iPhone offers for rescue and emergency situations save thousands of lives every year. One such feature, which we hope you never need, is Check In. We tried to introduce and explain how to use it in this article. Of course, the iPhone has many other features. The best way to unlock all its potential is to buy Apple One subscription. By activating Apple One, you can easily access all of your iPhone’s features.